
How to Use a Cast Iron Tagine: Step by Step
The Moroccan tagine is famed for converting budget cuts of meat, fresh aromatics, root vegetables, and warm spices into exceptionally tender, broth-rich feasts. Traditional clay versions can crack under direct flame, require lengthy water soaking, and fail on induction hobs.
An enameled cast iron tagine solves these limitations by combining a heavy-duty, vitreous glass-sealed iron base with a classic steam-recirculating conical lid.
At Shijiazhuang Zhengzhong Technology Co., Ltd. (Center Enamel), we have manufactured elite enameled cast iron cookware since 1989. Drawing on over 30 years of industrial expertise, >90% automated machine-casting, and proprietary in-house enamel frits, we supply top-tier kitchenware brands and global distributors across more than 50 countries.
Follow this step-by-step master guide to unleash the full potential of your enameled cast iron tagine.
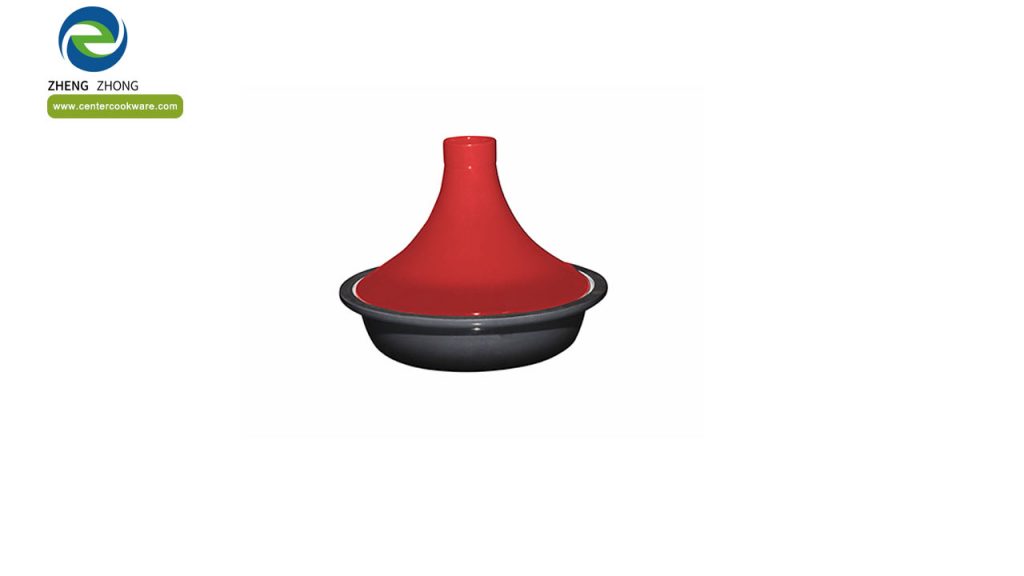
Step-by-Step Guide to Cooking with a Cast Iron Tagine
Step 1: Prepare the Base (Zero Seasoning Needed)
Unlike raw cast iron or unglazed earthenware, high-quality enameled cast iron is sealed at the factory inside high-temperature kilns (740°C–790°C).
- Action: Simply wash the vessel with warm water and mild soap before its first use. Do not soak or oil-season the pot—the non-porous glass interior is instantly ready for cooking.
Step 2: Sear Aromatics and Meats directly on the Base
Because the base is forged from high-density ferrous iron, you can sear ingredients directly on the stovetop—a technique traditional clay tagines cannot sustain without cracking.
- Action: Heat 2–3 tablespoons of olive oil over medium-low heat. Add chopped onions, garlic, and ginger. Sear your protein (lamb shoulder, chicken thighs, beef shank, or root vegetables) directly on the iron surface to develop a rich caramelization (fond).
Step 3: Layer Ingredients Architecturally
Tagine cooking relies on vertical layering rather than constant stirring.
- Action: Keep the softened onions at the bottom as a protective thermal cushion. Mound the protein in the center, and arrange dense vegetables (carrots, potatoes, squash) around and over the meat in a conical shape. Top with delicate additions like dried apricots, prunes, olives, or preserved lemons.
Step 4: Add Spices and Minimal Cooking Liquid
The hallmark of tagine mechanics is self-basting condensation. As steam rises, the cooler upper walls of the cone turn vapor back into liquid droplets that drip continuously over the food.
- Action: Season generously with spices like ras el hanout, cumin, turmeric, cinnamon, and paprika. Add only a small splash of liquid (approx. ⅓ to ½ cup of broth or water). The ingredients will release their natural juices, which the tall lid traps inside.
Step 5: Cover and Simmer Low-and-Slow
- Action: Fit the conical lid snugly onto the cast iron base. Reduce the burner flame or induction power to low to medium-low.
- Pro Tip (Resist Peeking): Keep the lid closed. Lifting the lid releases trapped steam pressure, dropping the internal temperature and extending cooking time. Simmer gently for 1.5 to 2.5 hours depending on the protein.
Step 6: Serve Direct Stove-to-Table
- Action: Turn off the burner and let the tagine rest for 5–10 minutes. Use oven mitts to carry the base directly to the dining table. The vibrant porcelain glaze offers an stunning tableside presentation, while the iron core keeps the dish piping hot throughout the meal. Serve alongside couscous or crusty flatbread.
Manufacturing Superiority: Why Center Enamel Tagines Excel
Achieving consistent results during low-and-slow cooking requires precision engineering in the vessel itself:
- >90% Automated Machine-Casting: Eliminates internal air pockets in the metal, ensuring uniform thermal conduction and an ultra-flat base that sits flush on cooktops.
- Proprietary Enamel Frits: Independently developed porcelain glazes deliver high thermal shock resistance and complete non-reactivity, protecting your food from metallic leaching.
- Global Certified Compliance: Manufactured under ISO 9001:2015, BSCI, and Facility Security audits, satisfying LFGB (Europe), DGCCRF (France), and California Prop 65 (USA) standards.
Data Table: Tagine Cooking Parameters & Troubleshooting
| Step / Parameter | Recommended Best Practice | Common Mistake to Avoid | Center Enamel Engineering Advantage |
| Initial Searing | Medium-low heat on stovetop | Extreme thermal shock without oil | Proprietary frit resists thermal shock |
| Liquid Quantity | ⅓ to ½ cup of liquid (minimal) | Filling base like a soup stew | Conical steam recycling traps moisture |
| Heat Source | Gas, Electric, Ceramic, Induction | Direct high heat (scorches food) | Ferrous flat base for optimal heat flow |
| Cleaning Routine | Hand wash with warm soap & sponge | Abrasive steel wool or immediate cold submerge | 100% Rust-proof vitreous glass barrier |
Frequently Asked Questions (FAQ)
Do I need to soak or season an enameled cast iron tagine before first use?
No. Traditional unglazed clay tagines require multi-hour soaking and oil baking. An enameled cast iron tagine features a smooth, non-porous vitreous glass interior that is completely sealed at the factory—zero soaking or oil seasoning is required.
Can an enameled cast iron tagine be used on induction hobs?
Yes, absolutely. Because the base is forged from high-density ferrous cast iron, its precision-machined flat bottom makes efficient magnetic contact with all induction stoves, gas burners, electric coils, and ceramic cooktops.
Can I put the entire tagine in the oven?
Yes. Both the cast iron base and oven-safe lid can transition straight from the stovetop into baking ovens. Always verify temperature caps if your lid knob is made from phenolic resin rather than stainless steel.
What food safety certifications do Center Enamel tagines carry?
All cookware manufactured by Center Enamel complies with major global food-contact safety regulations, including European LFGB, French DGCCRF, and California Proposition 65 (USA), backed by ISO 9001:2015 and BSCI factory credentials.